Techniques
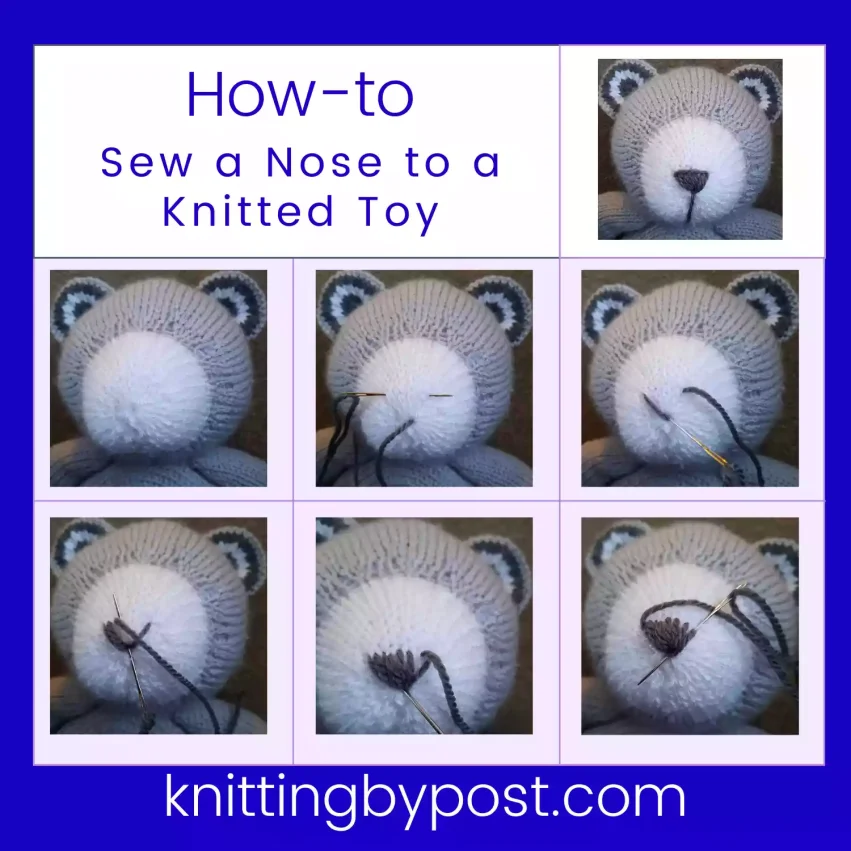
How to Sew A Nose to a Knitted Home Made Toy
Adding a nose to your knitted toy is a simple and important step that can greatly enhance its personality and appeal. Whether you have made a stuffed animal or a character toy, sewing a nose helps give the toy more expression. Here’s a straightforward guide on how to do it.
If you like this, here are instructions on how to sew eyes to a knitted toy
Materials You Will Need
- Needle and thread of yarn (choose a colour that matches or complements the toy you are making)
- Scissors
- Stuffed toy head
Step-by-Step Guide
Step-by-Step Guide to Sewing a Nose on a Knitted Toy
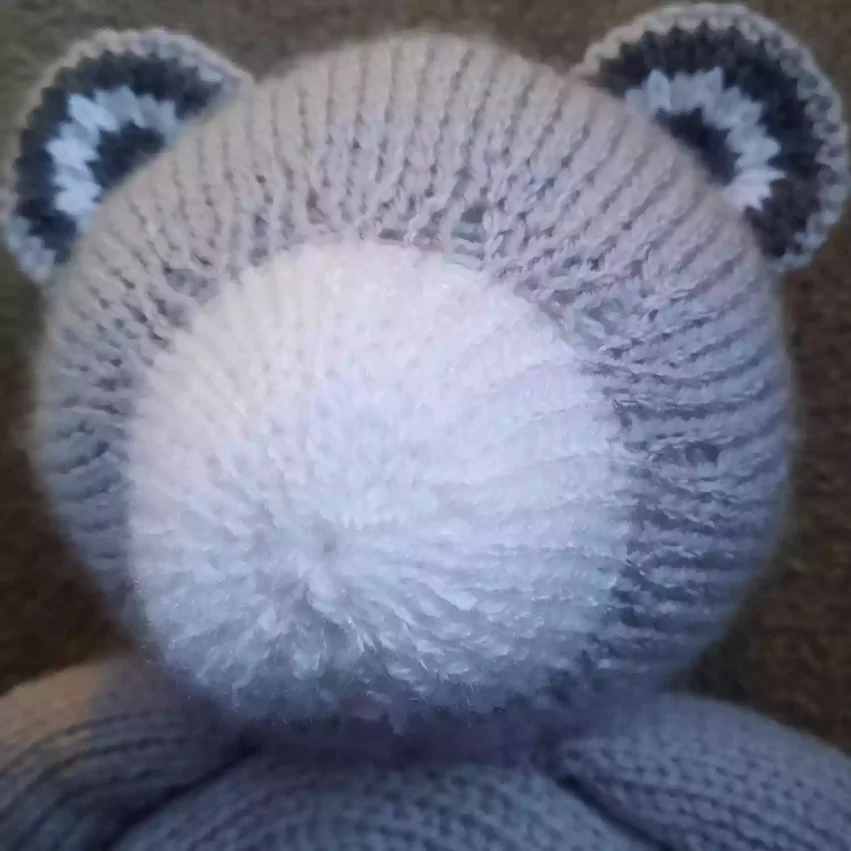
Step 1: Starting Point
Begin with the knitted toy’s face ready, ensuring the area for the nose is and centred. Take a minute to look at the face carefully to find the centre that you are happy with. It is possible to add a small pencil mark or use a pin to mark the centre.
Sitting the toy on a table to work with can help greatly with keeping everything still whilst working.
Thread a needle with a length of yarn in the desired nose colour. Tie a knot at the end of the thread.
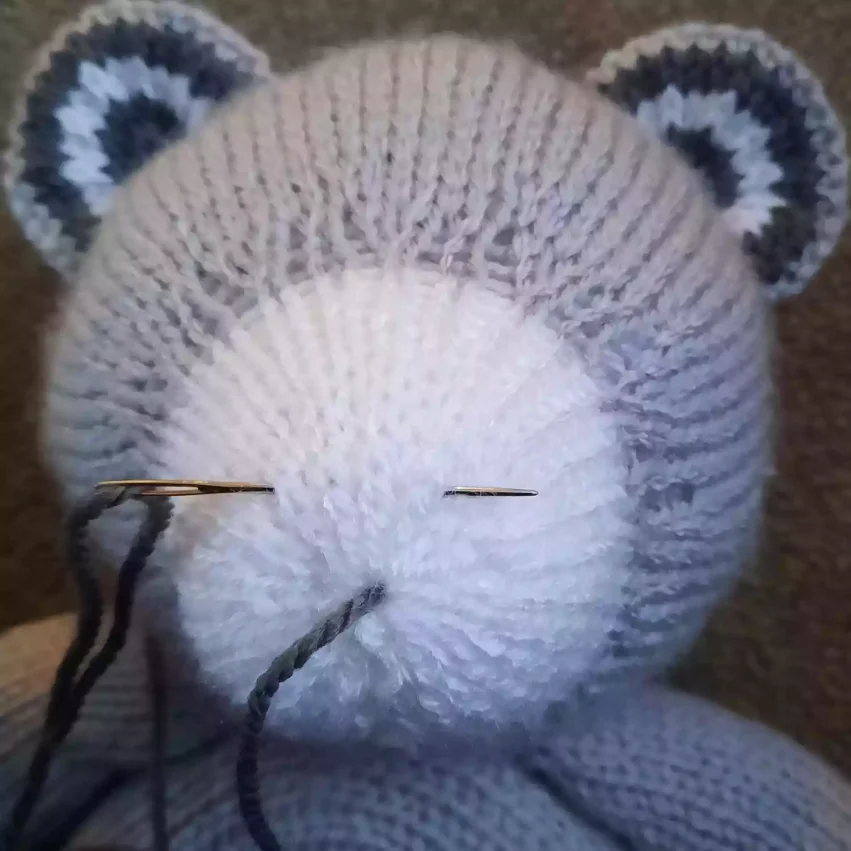
Step 2: Mark the Outline
Insert the needle from the back of the toy or an inconspicuous area, bringing it out at the bottom of the nose’s intended position. In this case it is the centre of the snout where the bound of stitches are.
It is possible to poke through one of the holes in the knitting if the knot isn’t too big. It will get ‘stuck’ inside the toy stuffing. This will secure the knotted end inside your work.
Pull the needle through until the knot is secure and not visible.
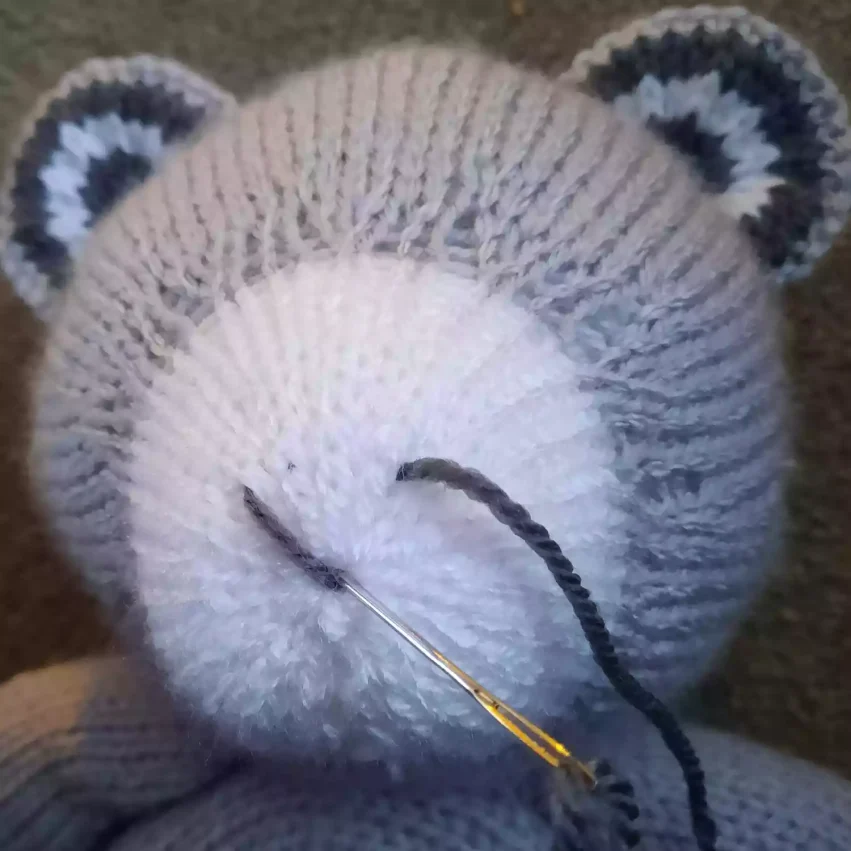
Step 3: Stitch the Base Shape
Push the needle back into the face at the top left edge of the nose’s intended area. Take the needle to the right whilst it is inside the work and bring it out again at the far right side of the work
Push the needle back into the work at the base of the nose again. This creates the ‘V’ outline of the nose.
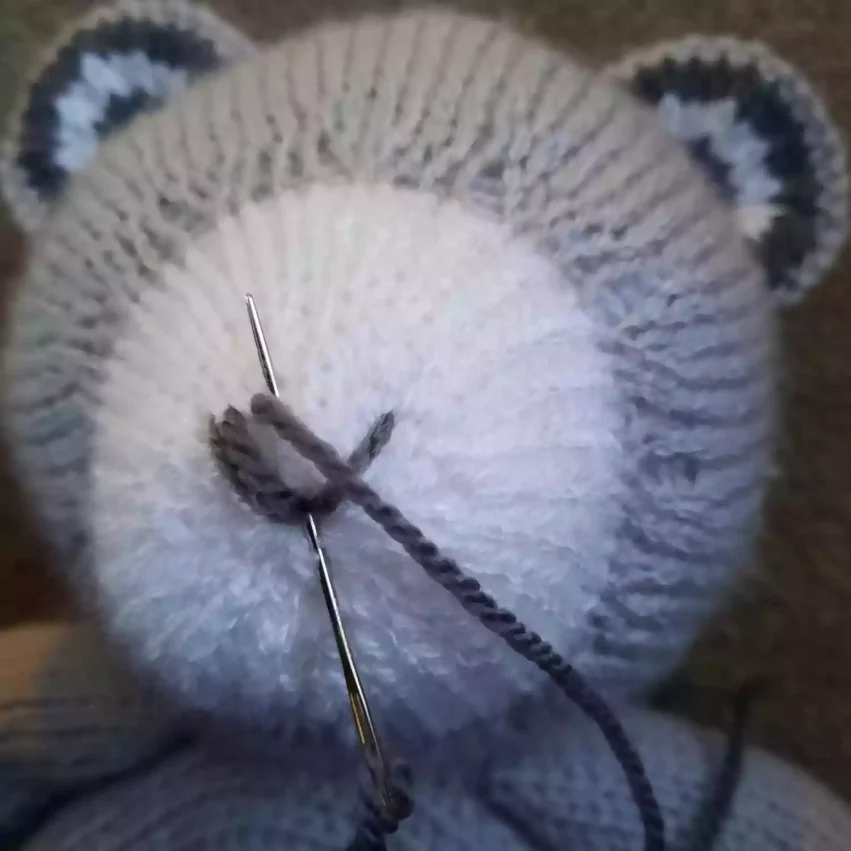
Step 4: Begin Filling the Nose
Bring the needle back up near the first stitch, slightly to the side and then back in at the centre of the ‘V’ again.
Begin stitching from left to right across the nose, working your way along in rows. Always insert the needle back into the same hole you began with so the nose keeps the shape at the bottom.
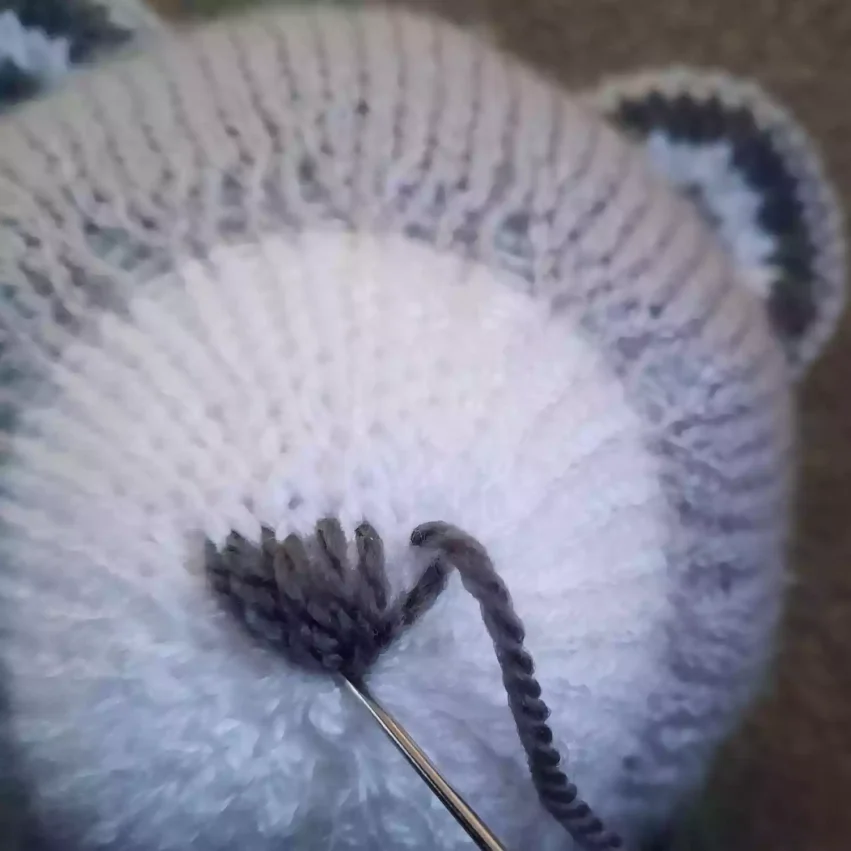
Step 5: Continue Adding Rows
Continue sewing stitches from left to right, close together, building up the shape of the nose.
Ensure each stitch covers any gaps, creating a solid and smooth nose.
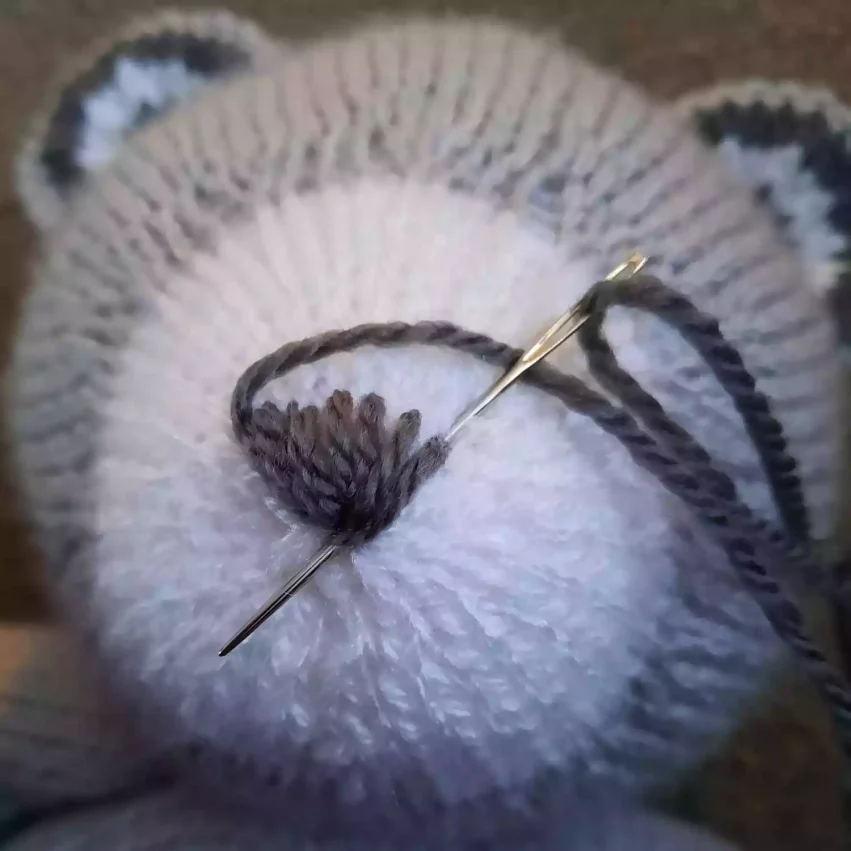
Step 6: Stitch along the top
When you are happy that you have enough stitches along the top edge of the nose, take one final thread from top left, along the top and insert it at the top right to give a single horizontal stitch.
This will hide the ends of the stitches at the top of the nose.
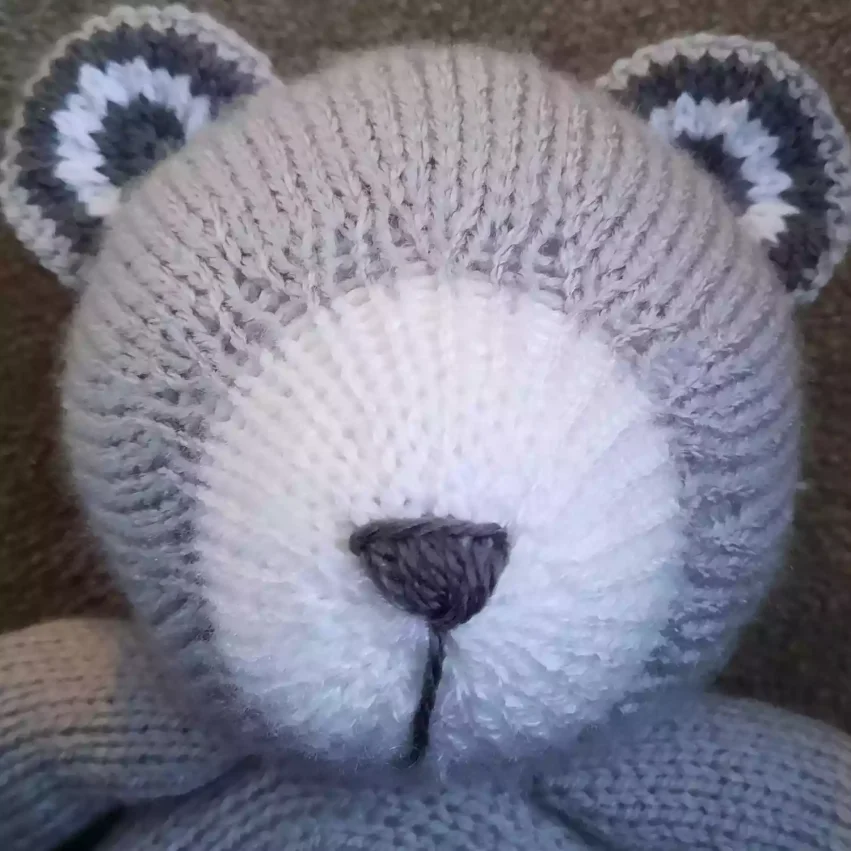
Step 7: Secure and Finish
Optionally sew down from the nose to the neck line under the chin if there is to be no mouth.
Finish by pushing the needle through the toy and bring it out again in another spot on the head. Push the needle and thread in again, in the same spot and bring the thread out at another angle. Repeat this several times and the thread will become stuck inside the head and will not be able to be pulled out easily or unravelled from the nose. Cut off any excess yarn.
Well done! You have sewn a nose to a knitted toy.
