
Christmas Knitting, Free Knitting Patterns
FREE Little 2 Needle Stocking

Here is a two needle Christmas stocking. It is a free pattern for you to use.
The stocking was made with 3mm single pointed needles and double knitting yarn. The pattern will scale so you can use chunky or aran yarn as you prefer to make a bigger version.
Abbreviations : k – knit. p – purl. st – stitch. tog-together. st-st – Stocking Stitch (k1row, p1row). inc— increase. Knit into the front and the back of the stitch
Stocking—Make 1

With white, cast on 32 sts
Next: (k1, p1) to end
Complete the last row 14 times in total
Change to main colour
Starting with a purl row, st-st 15 rows
Cast off 16 sts, knit to end (16 sts)
Top of foot
Starting with a purl row, st-st 15 rows

Shape toe
Change to white
Next: k2tog, knit to last 2 sts, k2tog
Purl 1 row
Complete the last 2 rows until 6 sts remain on the needle
Next: inc1, knit to the last stitch, inc1
Purl 1 row
Complete the last 2 rows until there are 16 sts on the needle
Sole of foot
Change to main colour
Starting with a knit row, st-st 16 rows

Shape ankle
Change to white
Next: k2tog, knit to last 2 sts, k2tog
Purl 1 row
Complete the last 2 rows until 6 sts remain on the needle
Next: inc1, knit to the last stitch, inc1
Purl 1 rowComplete the last 2 rows until there are 16 sts on the needle
Cast off
Assemble the stocking using the diagram for help.
- Lay the stocking on a table with the right side down on the table.
- Fold the widest part (with the rib) in half along the length so you can see the right side of the top of the stocking.
- Fold the cast off edge (white) down to the partially cast off part (Contrast colour) and sew them together.
- Then, take the white toe and ankle and sew the seams together. (see diagram)
- You should be able to see the shape of the stocking now. Sew the rest of the seams together to complete the shape.


Here are some suggestions to customise your stocking …..

Make a knitted hanging loop
With your chosen colour, cast on 20 sts
Starting with a purl row, st-st 3 rows
Cast off.
Fold in half and attach both ends at the top of the stocking in a loop.
Make a twisted cord hanging loop
A twisted cord is made by taking three pieces of yarn approx. half a metre long and fastening one end to a static object for example a door handle. Take the other end of the yarn and twist several times. Then allow the yarn to fold in half upon itself and it will twist. Knot each end to stop the twist from unravelling. Cut to the length desired and attachto the top of the stocking in a loop.
Ribbon Loop
If you don’t want to knit a loop, use a small piece of ribbon to create a hanging loop.
Extra Decorations
It is possible to add other decorative items to the front of the stocking. Here are some suggestions…

Mittens – Make 2
With white, cast on 16 sts
Knit 2 rows
Change to your contrast colour
Next: k7, inc1, inc1, k7 (18 sts)
Purl 1 row
Next: k8, inc1, inc1, k8 (20 sts)
Purl 1 row
Next: k7, cast off 6 sts, k7 (14 sts)
Starting with a purl row, st-st 3 rows
Next: k2tog to end (7 sts)
Draw thread through the remaining stitches and pull tight
Sew down the row ends of each hand and across the thumb. Take the piece of ribbon and insert it into the glove at the side closest to the thumb and secure with a stitch.
Snowballs
With white, cast on 8 sts
Next: (k1, p1) to end
Next: increase into every stitch (16 sts)
Next: (k1, p1) to end
Knit 1 row
Complete the last 2 rows 2 times (4 rows)
Next: (k1, p1) to end
Next: k2tog to end (8 sts)
Draw thread through the remaining stitch-es and pull tight.
Sew down the row ends, add a little stuffing and seal up.
Attach the snowballs to the end of a twisted cord or ribbon as above and attach so it dangles from the front centre of the stocking.
Holly Leaves – Make 2
With green, cast on 2 sts
knit 1 row
*Next: inc1, inc1 (4 sts)
Next: inc1, k2, inc1 (6 sts)
Next: inc1, k4, inc1 (8 sts)
Next: k2tog, k4, k2tog (6 sts)
Next: k2tog, k2, k2tog (4 sts)
Next: k2tog, k2tog (2 sts)
Repeat all rows once more from *
Knit 1 row
Bind off both stitches
Berries – Make 3
With red, cast on 2 sts
Next: inc1, inc1 (4 sts)
purl 1 row
Next: k2tog, k2tog (2 sts)
Draw thread through the remaining stitches and pull tight
Take the cast on edges of the holly leaves and stitch them together at a right angle to each other. Take the berries and loosely stitch all the way around the outside and pull tight to form a small circle shape. Attach the three berries to the centre of the holly over the top of the leaves in the centre.
More Stockings
£4.99 Leaflet
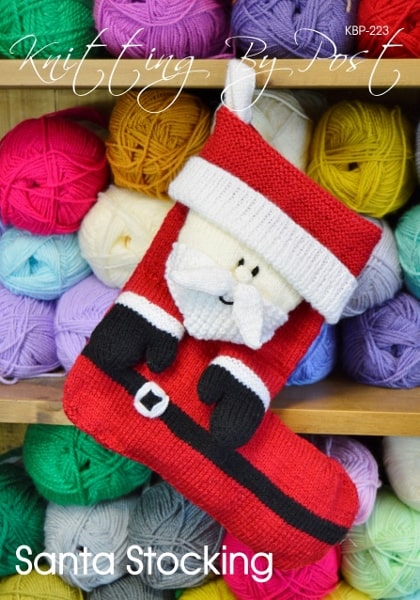
A stocking straight from the North Pole! Knit this festive Santa stocking, perfect for filling with Christmas gifts and treats.
This product has multiple variants. The options may be chosen on the product page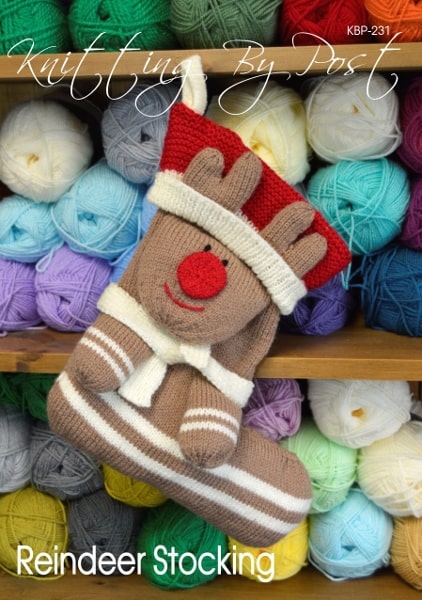
£4.99 Leaflet
Here is a twist on a traditional Christmas favourite. He is a larger knit than our usual patterns so you can get your needles clicking with this one. Fill the reindeer with Christmas goodies.
This product has multiple variants. The options may be chosen on the product page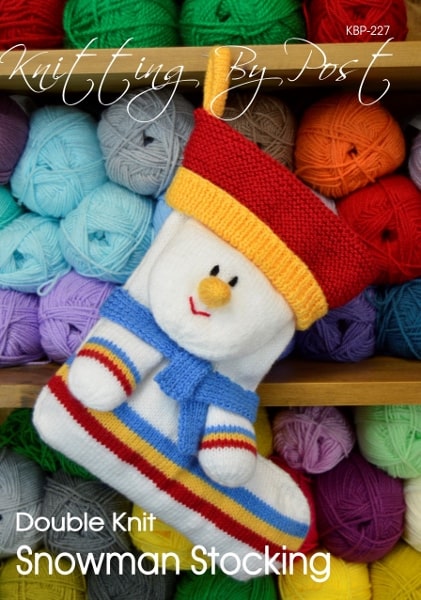
£4.99 Leaflet
Here is a twist on a traditional Christmas favourite. He is a larger knit than our usual patterns so you can get your needles clicking with this one. Fill the snowman with Christmas goodies.
This product has multiple variants. The options may be chosen on the product pageEven More Patterns
£4.99 Leaflet
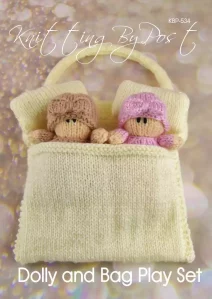
Two Cute Dolls All Ready For Play Time. Knitting Pattern for Bag, Dollies and Accessories.
This product has multiple variants. The options may be chosen on the product page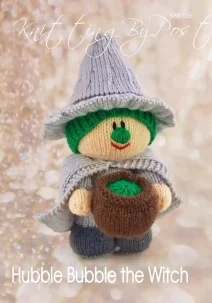
£4.99 Leaflet
Hubble Bubble The Witch, be spellbound with every stitch. A Halloween special.
This product has multiple variants. The options may be chosen on the product page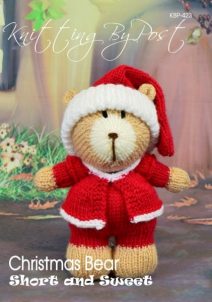
£4.99 Leaflet
Short and Sweet, Little and Cute Bear. A Great Knitted Christmas Gift
This product has multiple variants. The options may be chosen on the product page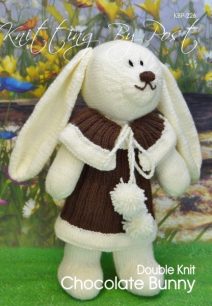
£4.99 Leaflet
Knit a chocolate rabbit that won’t melt! This tall and elegant Easter soft toy is dressed in a lovely cream and chocolate outfit.
This product has multiple variants. The options may be chosen on the product page
£4.99 Leaflet
A robin is the sign of a great British winter. Knit this cute little fella, he is ready for any cold snap with his hat and scarf.
This product has multiple variants. The options may be chosen on the product page
Knit the sweetest bedtime buddy with this bear-shaped pyjama case pattern! This cuddly companion keeps sleepwear snug and tidy while adding a touch of handmade charm to any room. No need to paws—this pattern is simple, fun, and utterly adorable.
This product has multiple variants. The options may be chosen on the product page